SLIDER

Doodling

Thursday, December 22, 2011
I always practice machine quilting by doodling with pen and paper. It really is true that if you can draw it you can quilt it out. The more you practice your doodles the better your brain will be at telling your hands or machine which way it needs to go.

quilt doodle

The flower in this doodle is a place holder. It could be a star block, some applique, anything really. I was watching a Linda Taylor video and wanted to try out some of the techniques she was demonstrating. I love the Dr. Seussy feeling of the main back ground fill. I also like the inner border and how easy it was to draw it out.

I really need to learn how to think upside down. I've noticed that my designs are wonky anytime I have to do them upside down or from right to left. I guess it all comes down to practice and it's definitely easier to practice on paper than it is to practice on the machine. I can practice on paper anywhere, anytime. Like at the Dr's office, waiting in the car pick up line, at church (he he), in bed etc.

You really ought to try doodling too. I find that a 9"x12" pad works best because it's big enough to let you practice drawing bigger. When I first started doodling my doodles were always tiny, but you will get better results if your doodles are closer to the size you would put on a quilt.

~ Norma

Winner

Saturday, December 17, 2011
Wow! Sew Mama Sew Giveaway Day was a HUGE success. I had 518 comments left. Who knew cute little goldfish where in such high demand. I still have some in my stash so I might just have to do it again sometime.

The super lucky winner is # 418
The Average Quilter (a machine quilter herself) said:

I know how excited you are - I have a longarm myself and I love quilting other peoples quilts. Good luck on you venture

Thank you so much for answering my question, I have gained a lot of insight and have noticed a few misconceptions. I'll be doing some "mythbusting" posts over on the machine quilting blog to clear up those misconceptions.

Have a great weekend,
~ Norma

Deliciousness

Friday, December 16, 2011

The other day I opened up an early Christmas present. I’ve always wanted a cast iron Dutch oven but the prices have kept me from getting one. Even the “cheap” ones are in the $100 range. I was so excited to finally get one and at a super price! During Black Friday I came across an internet super deal and for $20 got a 5 1/2 quart Dutch oven.

I decided to make Pioneer Woman’s “Perfect Pot Roast.” I’ve never been able to make a roast that I actually enjoyed. This recipe was super delicious, super easy and came out so flavorful. I don’t know if it was the recipe or the Dutch oven. My kids ate every bite of food from their plate!

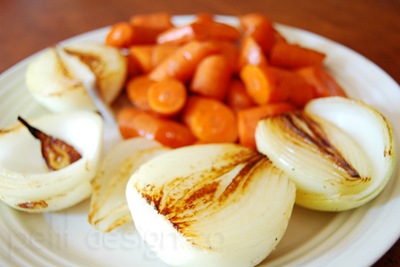
pw_roast

I followed the recipe exactly using her step by step photo tutorial as a guide. My onions and carrots even turned out as pretty as hers. I couldn’t resist snapping a picture.

So besides a pot roast what can I make in a Dutch oven?

~ Norma

Giveaway Day

Monday, December 12, 2011
Sew Mama Sew giveaway day is one of my favorite days of the year. Good thing it comes around twice a year! I love finding new blogs and if I'm lucky to win a little something... well that's the icing on the cake! Head on over to enter lots of other giveaways too.

My regular readers (if I still have any!) have probably noticed that I have been missing for quite sometime! I've been pretty busy with life (new baby) but I've also been super busy working on a new site/project. I am now ready to start accepting customers for machine quilting services. *eeep* I'm so excited! The site still needs a few tweaks here and there but I can start accepting customers now.

I'm running a super special right now so make sure you check it out if you need help turning those tops into quilts. You could get a quilt top machine quilted for as low as $30! Spots fill up fast as I limit the number of quilts I take in per month.

OK enough of the info-mercial. We all know you are here for some fabulous hard to find, out of print "fish in bags!"

I will give 2 fat quarters, one blue one white, to one lucky reader. I will ship to anywhere in the world even! The giveaway will close December 16 and a winner will be chosen on December 17th by random number generator.
For entries (leave a separate comment for each entry):
  • Leave me a comment telling me what would entice you to send out your quilt to be quilted. Could it be free shipping, free batting, free binding service, an awesome price? If you've had any bad experiences with a machine quilter let me know about your experience so I don't make the same mistakes! (no names please)
  • I love my followers so you get an extra entry if you follow my blog.
  • The best way to keep up with any specials I might be running is to follow my new Machine Quilting blog and you'll get an extra entry too.
So that's it 3 easy ways to get your name in the pool for some super cute fishy fabric.

~ Norma

A Few of My Favorite Things …

Saturday, December 3, 2011

fave

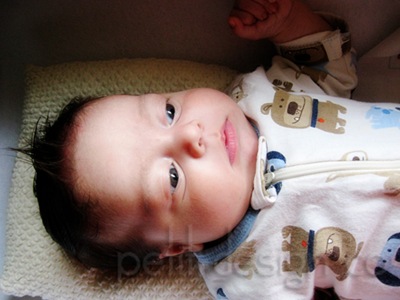
I can’t believe he’s 4 months already! I could kiss those little cheeks ALL day long.  *sigh*

Have a great weekend
~Norma

Try it out

Wednesday, October 26, 2011
If you've been wanting to place an order with Connecting Threads here is a handy code to get you free shipping.

Use promo code TRYITQCA at Connecting Threads to get free shipping on your next order. Expires 11/9/11 and is not valid on batting or items shipped directly from the manufacturer.

I love their Essential Pro polyester and use it when quilting on my Brother 1300 at high speeds.
It doesn't break as often as other threads and it doesn't produce as much lint. I've tried their Essential Cotton Threads too but they are thicker than the poly thread.
 I don't mind the cotton thread when I am quilting off the frame at slower speeds.

Enjoy!
~ Norma

New Hobby

Tuesday, October 25, 2011

I’ve decided to take up the super fun hobby of vacuuming! HA!

2-11 Cleaning sucks

No really, I’m not kidding. You see I have two very big reasons for taking up the sport of vacuuming:

1) it usually calms Mr. Grumpy Puss, aka the baby, and if that doesn’t work then

2)at least I don’t have to listen to his wailing for 15 minutes!

~ Norma

Eye Candy

Monday, October 24, 2011

Head on over to the Lick Skillet Quilt Guild blog to read my latest post and see some beautiful quilts.

This is the lovely “Opportunity Quilt” that my guild is using as a fund raiser.

DSC_8496

A $1 donation gets you a ticket or an opportunity to win this quilt. The drawing will be held in April, just in time for Mother’s Day. Feel free to send me an e-mail if you want to make a donation and we’ll work it out.

~ Norma

Here and There

Wednesday, October 19, 2011

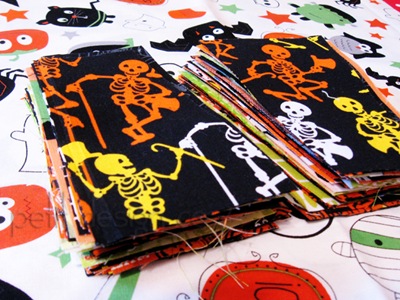
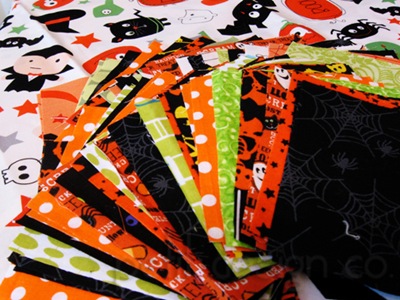
I was able to steal a few minutes here and there yesterday in my sewing room. Using my Accuquilt Go! I was able to turn Saturday’s stack of fabrics into two stacks of fabrics.

halloween_fabric2

Can anyone guess what pattern I’m making? Yup, those are all the pieces… well the background fabric is going to be white so imagine a stack of white fabric cut in the exact same way.

Did you make any Halloween projects this year (or are still working on them)? I’d love to see what you’ve been working on.

~Norma

I Love What I Do

Monday, October 17, 2011

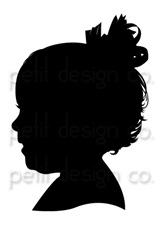
I’ve said it before and I’ll say it again, I don’t think I’ll ever get bored of making portrait silhouettes.

proof

Each one is unique, each one is challenging and each one is super fun to make. Sometimes as I’m working I doubt that the silhouette will “look right,” but when I change the fill color to black something magical happens and it “just works.” I love my job!

~ Norma

Finally

Saturday, October 15, 2011

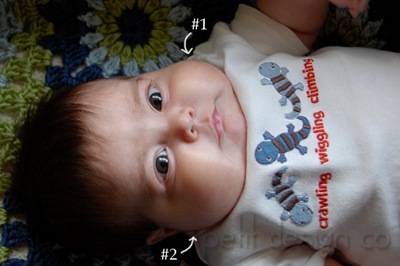
My little guy has been quite the handful the last few weeks. He went from this:

Ev1

super happy baby one day to this:

Ev2

horribly unhappy baby the next day.

I was to the point of exhaustion because he was NOT sleeping, crying all the time, and having stomach issues. After about 2 weeks and a visit to the pediatrician I’ve cut out milk from my diet and swapped his supplemental formula to a soy based formula. It made a huge difference but he was still NOT sleeping well.

Finally a friend told me about “Baby Wise.” In a matter of 3 days (today is day 3) my little guy is sleeping like a champ during the day and sleeping 5 hour stretches at night. I am catching up on sleep, laundry, dishes and I even got a little time with my Accuquilt Go!

halloween_fabric

Stealing a few minutes here and there I was able to cut enough pieces for a Halloween quilt. I don’t know if I’ll actually find time to sit at the sewing machine before the 31st, but it does feel good to be planning a quilt again.

~ Norma

1 Month

Friday, September 2, 2011
It's been about 5 weeks since my last post. I can't believe it's been that long. Things around the Petit Design household have gotten a little more hectic, a lot more lax, and a lot more cuddly.

My little guy was born a month ago and already I cannot imagine life with out him.
OK so maybe I can imagine a lot more sleep!

I'm pretty much recovered from my c-section, it's the nursing that's killing me. This little guy is a voracious empty pit with a very strong sucking instinct. This makes for one very sore mama, plus I think I have now developed thrush. :( *boo, hiss, spit* That plus lack of sleep = no sewing whatsoever. Come to think of it, it really = not much of anything is getting done around here!

I have been working on some new items for my shop though. I've started a new line of Applique Templates. These are just that, a template for applique (or scrapbook paper piecing, embroidery, crafting etc.) You can us them on quilts, t-shirts, aprons, etc. It does not contain any instructions on how to do applique (there are many applique tutorials on the web.) To give you an idea of what my templates are like I thought I would share a free applique template with you all. It's still a very hot summer in the south so we're still enjoying popsicles. You can enjoy some too even if summer has left your part of the world!
Click the image to go to the pdf
make sure you choose "landscape" on your printer 

Share your creations over at the Petit Design Co. Flickr pool. I love to see what you make.

Have a great Labor Day weekend, and enjoy some popsicles.
~ Norma

PS I hate the banana flavored ones, YUCK.

Trekking Along

Sunday, July 24, 2011
I seem to be on a roll! I was able to crank out another 2 blocks for the Farmer's Wife quilt.
FW #69

I picked two easier blocks since #43 gave me such a hard time. I am loving how I can just focus on each individual little block and have a sense of accomplishment after finishing each one. I think that is what I'm finding so appealing, the sense of "accomplishment." This baby is coming in little more than a week and I know I will not be able to finish any of my other projects, not that I have the desire to work on them anyway. Once the baby arrives I know it will be weeks before I will feel well enough to sit and sew (this baby is coming via repeat c-section.)
FW #44

These little blocks are "done" and will stay "done." I can't say the same thing about anything else in my house. Laundry, dishes, dust, and trash will keep on multiplying. Tummy's will have to be fed, daily, three times a day even! I'm so grateful to have such an understanding husband who tells me I'm working hard "just sitting there." He says it with a smile but I know he means it in a nice way! ... and I'm glad he means it because lately I feel like this:
Source: piccsy.com via Kim on Pinterest

I hope you have a great week!
~ Norma

oh and my progress so far:
FW Progress 7-24

What a Nightmare!

Saturday, July 23, 2011
Last night I was determined to finish up block #43 from "The Farmer's Wife." That was a doozy of a block and I suggest you save it for when you are feeling a bit more confident about piecing such tiny little blocks with loads of pieces and y-seams.
FW #43

I ended up with 2 little puckers but I think I will go back and fix it later... much later. I've had enough of this block for now. It honestly wasn't that hard but there sure were a lot of pieces. Everything ended up perfect until I got to the y-seams. It all went down hill from there. It took me several hours to make this block but I was determined to not give up and to paper piece the darn block. Am I glad that's over!
FW #43

I whipped up this progress chart in EQ6 by importing my .jpg block images and placing them into the quilt layout. If you are going to do this you should crop your images as close to square as possible and also make them low resolution so you don't overload EQ6. (I made my images 72ppi)
FW Progress 7-23

I am not sure what colors I will be using for the cornerstones, sashings or borders. For now I threw in some grays and of course red and aqua/teal. For now the blocks are placed in the exact spot they appear in the book, just to make it easy to track my progress, but I can already see that some blocks will have to be moved around to better distribute color and value.

I also sent off this quilt back to it's owner.
HST trip quilted

That is not a pantograph, it was done free motion. I hope this beautiful quilt makes someone really happy!

~Norma

... and Two Steps Back

Thursday, July 21, 2011
Apparently being super productive this late in pregnancy only makes you super tired the next day! Tuesday morning was wasted while I spent 3 hours at the OB's office, mainly in the waiting rooms. I understand that Dr's have emergencies (she was called to deliver a baby) but the receptionist could have let those of us in the waiting room know and given us the option to maybe come back in an hour or two or to even re-schedule.

After that I took my kids out to meet daddy for lunch because they were on their very best behavior the entire 3 hours! Then I came home and crashed for a two hour nap. Afterwards the only productive thing I did was to whip up block #103 of the Farmer's Wife.
FW #103
Fabrics: Tufted Tweets + Kona Snow

I'm starting to understand how paper piecing works and have even gotten away with combing a few pieces that EQ suggested be pieced separately. I guess sometimes EQ makes suggestions not knowing that you will be using the same fabric for adjoining pieces. As you can see in the picture below I was able to combine the 3 sections for the middle portion of the block into one big section. The top and the bottom sections were also combined into simplified versions.
FW #103
And yes my whirlwind is spinning in the opposite direction because I forgot to mirror the template when I printed it out. That's ok though, it doesn't bother me one bit!

Yesterday was a lazy unproductive day as well. After being woken up at 6am with another mother of all charlie horses (major muscle cramp in the leg, for those of you unfamiliar with the term) that left me limping for the rest of the day. I'm glad I only have a week and a half left to go! Then maybe I can fall asleep peacefully at night without fear of stretching the wrong way in my sleep.

~ Norma

Awesomely Productive

Monday, July 18, 2011
Being productive has been a rare thing since I got back from UT in May. The car accident really threw off my "groove." Visits to the chiropractor and to the OB take up a ton of time and energy. Now I'm a mere 2 weeks away (as of tomorrow) from my scheduled c-section. Finding the energy and urge to do anything productive, beyond eating and napping {hey that's productive right?!} is really, really tough. As a result my house is embarrassingly messy and dusty. The dishes are often piled in the sink, and my kids have learned to fend for themselves {pb&j and cereal anyone?} Luckily I have a super awesome husband that hasn't uttered a word of complaint and tells me I'm doing a great job! {I love that man!}

Today was the most productive day I've had in a long time. I actually made my bed this morning, did some laundry, organized and cleaned out the linen closet, made lunch for the kids, made another block from "The Farmer's Wife"
FW #81
FW #81
Fabrics are Katie Jump Rope and Kona Snow

and not only started, but finished the quilting on my first customer quilt.
HST Trip

 you can see my sketch of the quilting pattern I did

To top it all off I made dinner! OK so I threw a pizza in the oven and made a salad. Baby steps right? Oh and let's not forget this blog post too. Tomorrow I'll post some more pictures of the quilting on the HST quilt before I ship it off to it's owner.

~ Norma

My First Block

Sunday, July 17, 2011
I managed to finish my first block for the FWQAL. It's block # 14 and it's called " Butterfly at the Crossroads"
FW #14

In the picture you can catch a glimpse of how the second half of the book is set up. At the top you see a thumbnail picture of the block done up in fabrics. Then you get an exploded view of the block that illustrates the suggested piecing order. To the left of that (under my block) is a small cutting list that tells you how many and what templates you need to use to make up the block. (You can read my full review of the book and EQ companion CD here.)

As I mentioned before, I will be paper piecing my blocks because that is a skill I want to learn/improve. This block took me waaaaay longer (like an hour!) than a rotary cut version would have taken. I attribute that to being such a novice paper piecer! It's a bit hard for me to wrap my brain around something that seems "backward" to me. I found Sonja's video tutorials over at Artisania super helpful. I know that, just as with any new skill, the more I practice the easier it will become. Besides it's worth it to have almost perfect blocks. I say almost because I'm still learning. I only had 2 points that didn't match up perfectly, but they are not horribly off.

My block finished at 6.25" square. I know that over on the Flickr page everyone is having their blocks finish up at varying sizes. Since I printed my paper piecing patterns from EQ6 I was able to open the block and check on the finished size. EQ6 says that the finished block size is 6". So once you add in seam allowances all around it should have finished up at 6.5" square. I'm not sure why it didn't end up being the correct size. The only thing I can think of is that it's my printer. I did make sure to print it at "actual size" with no scaling so that shouldn't have affected it. Honestly I don't' think it's that big of a deal as long as I keep using the same printer and settings to print up all of my patterns then all of the blocks should end up finishing at the same size.
FW #14

Oh, in case you're wondering about color scheme... I'm going with bright and scrappy on Kona Snow. I'm going to limit each block to 1 or 2 colors max in order for it to be visually pleasing. I don't like scrappy quilts that make my head spin!

~Norma

The Farmer's Wife

Saturday, July 16, 2011
By now many of you have probably heard about the Flickr Farmer's Wife Quilt-along.
If not, consider yourself warned! I tried to resist but once I saw Camille's blocks I was sold.

I ordered my book a few weeks ago and I want to share my review with you now that I'm ready to finally start working on my quilt blocks.


Farmer's Wife

top left: condensed templates, quilt layout (EQ6), paper piecing templates (EQ6)
bottom left: Farmer's Wife book (Amazon or Connecting Threads), EQ Companion CD (Amazon $13.59)

I ordered my book from Connecting Threads for $16.79 on sale otherwise I would have ordered from Amazon and gotten free Prime shipping. I was ordering some other items from Connecting Threads so it shipped for free. Once I received my book I quickly flipped through it and made the following observations:
  • The first half of the book features letters written by 1920's farm wives sharing why they think farm life is better than city life. Each page also features a photograph of a single block found in the sampler quilt. To tell you the truth I read a handful of letters and then got bored. It's just not my cup of tea!
  • The second half of the book features a single block per page along with template cutting instructions and a block assembly diagram. There are no written instructions on how to piece the blocks or in what order to piece the segments. Most blocks are pretty straightforward as to how you would piece the segments, but some of the more intricate blocks could be tricky.
  • The last 10 pages of the book has minimal instruction on how to assemble the quilt and add borders.
  • The very back of the book holds a CD with PDF files of all the templates required to make the blocks. The frustrating thing is that each template (100+) is on an individual PDF file. So printing out each template as is would require 100+ pieces of paper! I spent the better part of a day merging those templates into 14 pages. Unfortunately because of copyright rules I cannot share those files with you. There were also no instructions on how to use templates to piece together a block, so if you've never used templates this may not be the quilt for you.
After printing out my templates I was browsing the Flickr group when I found out that there was an EQ companion disc available for this book. Feeling overwhelmed by the templates and lack of instruction in the book I decided to order the companion CD from Amazon and got free Prime shipping. Here are my observations on the CD:
  • If you don't care for the letters and you have EQ 5 or 6 I recommend just buying the companion CD. (This is what I should have done) Oh, and according to the reviews on Amazon you should be able to use it with EQ7
  • You get a project file, as well as the whole block library and the fabric library.
  • I have EQ6 and I was able to print out paper piecing templates for assembling my blocks.
  • You can also print out templates for each block (just like the ones included on the cd with the book.)
  • You can also get rotary cutting instructions for each block.
  • You can print out blank "coloring sheets" of the whole quilt or of individual blocks
  • You can easily design your own quilt by dragging and dropping blocks, and trying out different colorways or fabric lines.
 So those are my opinions on both the book and CD.

I've decided that I'm going to be paper piecing my blocks for the following reasons:
  • The biggest problem I have heard on the Flickr group is that those using the templates are having a hard time getting consistent finished block sizes and points that will be chopped off once sashings are added.
  • While I can get rotary cutting instructions from the companion cd some of the sizes are in 16th of an inch increments. For example you will be directed to cut 4 squares measuring 2 and 5/16" Most quilting rulers are marked for an eighth of an inch. Besides I know that I would definitely mess up cutting when 16ths are involved.
  • I really want to learn how to paper piece. I've only made 1 paper pieced block ever.
Oh and in case you are wondering I printed my paper piecing templates on some newsprint that I cut down to 8.5"x11" and ran through my printer. Newsprint is thinner than regular copy/printer paper so it should tear away easier than copy paper. I did have to run each sheet individually through the printer because the rollers kept grabbing more than one sheet at a time. Out of 14 papers only one got jammed and that was because the feeding end wasn't completely flat.

Boy, that was wordy!

~Norma

Too Much Fun?

Saturday, July 9, 2011
This morning Mr. PD had to go in to work (very rarely does he have to work weekends) so left up to my own devices I had a little bit too much fun with the new light box I built.
First I pulled out my vintage Pyrex and the super delicious cherries I got from the grocery store yesterday. Delicious!
cherries1
cherries2
cherries3

Then I pulled out my cute red polka dot planter and some of my favorite red and aqua prints.
polkadot1
polkadot2

Then I moved on to bananas, mangoes, and summer squash! I need to edit those pics first though. Let me know if you have any interest in learning about using/making a light box and I'll write up a post if anyone wants to know.

Have a great weekend!
~ Norma

Lotsa

Friday, July 8, 2011
I've got "lotsa" stuff going on, mainly baby growing which is taking up all of my time, energy, and general will to do anything that doesn't involve eating or sleeping! I've only got 3 weeks and 4 days left, but who's counting anyway? Summer has kept me busy with soccer games, soccer parties, church stuff, eating (lots), a visit from my sister and her 2 kids, napping, hiking, swimming, dr's visits, Netflix and more napping. I have managed to squeeze in a few minutes here and there on crafty related projects around the house:

Fabric Petals

- I made a few more petals for the Joseph's Coat quilt that I"m slowly working on. I think this is going to turn into a "several years" project.
- I also chopped off some of my maternity pants into shorts and reclaimed the extra pieces into doll clothes for my daughter (pictures to come.)
- I acquired a Nikon D70s from my uber talented photography genius older brother and I've been trying to learn how to use it. I've got a ways to go before any of my stuff ends up looking like his. In fact I was so annoyed at it earlier that I busted out my old point and shoot for the above picture (shhh, don't tell!)
- I also built myself a nifty photography light tent  for taking cool pictures like the one above.
- I also received my first customer quilt from the Sew Mama Sew giveaway I hosted:

HST trip

Isn't it awesome? I have it up on my design wall right now. I just need to load it on the frame and decide on a quilting pattern for it.

Have a great weekend!
~ Norma

Overheard in The Car + Giveaway Winner

Thursday, June 2, 2011
Today was a long day. We got up early and drove the new car an hour to Birmingham (AL) to the nearest Mazda dealership. Oh, yeah we finally got a car for me since the untimely death of my beloved '92 Nissan Maxima (see previous post.) We knew we'd drive her into the ground, but we weren't expecting it so soon. She was replaced by a 2001 Mazda Tribute (same as the Ford Escape.) All week I've been driving the new car around to various places to get this checked, this fixed, registered, etc etc. I had to drive it to the dealership for some recall issues that were never performed on the new car. The re-calls were issued in 2003 and 2004, one was of a particularly scary possibility of the car stalling at high speeds. I'm glad it's taken care of and I can now drive it without feeling tense the whole time :)

On the way back home the kids were talking and playing in the back seat. I tuned in to their conversation at one point and heard this:
Ellie Mae: why do they call it Birmingham?
EJ: I don't know... maybe because they like to burn ham there. Mommy do you know why they call it "burningham" is it because they like to burn ham there?
Ellie Mae: yeah why do they call it "burningham"?!
At this point I was laughing hysterically. We've lived in AL for 2 years now and I just wonder how long my kids have been calling it "burningham." Gotta love kids and their fun take on life!

... and the winner of the quilting services is Lucky #51
MELANIE!!!
"I follow quilty giveaways. I would have to make something that small. I have a niece that I need to make a quilt for:) Thanks for the chance!"

Have a great rest of the week!
~ Norma

Giveaway Day!!

Sunday, May 22, 2011
Welcome all Sew Mama Sew readers!  I"m so excited that you've dropped in on my little corner of the universe. let me tell you a few random facts about me:
  • I'm Norma
  • I have 2 kids with 1 more joining the family in August
  • I just turned the (supposedly) big 3-0, but people still think I'm like 17 years old
  • I've been married to my most awesomest husband for nine years now
  • I love fabric. I love quilting. I love designing quilts. Piecing is tolerable but the actual quilting is my LOVE!
  • I also run the Quilty Giveaways Blog
  • I've just had the worst week of my life (WWOML)
Thank goodness for a good ole giveaway to help me focus on something other than the  WWOML. Where shall we start? As if being 7 months pregnant in the south wasn't intolerable enough. I've been sick since last Saturday when I got home from a super fun trip to UT (sadly I didn't make it to Quilt Market.) So after being cooped up for a few days I was starting to feel slightly better on Wednesday. So I decided to be all super productive and start working on the baby's room. This required a trip to Target for some organizational stuff. Well I didn't even get a block from my house when a 15 year old kid with a learner's permit ran the stop sign at a 4-way stop and t-boned into my driver side door :(


Luckily my 5 year old daughter, the baby in my tummy, and I are all OK. Sadly my car is toast. I really should have stayed in bed all day Wednesday too! So I've spent the latter of last week going to doctors offices, talking to insurance companies on the phone, getting police reports, car shopping, and a few more days in bed :)

Sooo... in order to help me out of this funk I want to give away something that is going to make us both happy. Did you see on the list above that I love quilting? I mean LOVE it. Well one of my goals for this year (see bottom left sidebar) was to start quilting for others. I'm finally at a point in time where I can start doing that! So for my giveaway I am giving one lucky person MACHINE QUILTING SERVICES! For freeeeEEEE! (think Adam Sandler in Bedtime Stories)


Here are the details, and if you don't agree please don't enter the giveaway!
  • I will quilt any quilt for you under 2000 square inches (crib size or smaller)  (length x width = less than 2000)
  • I will use my stitch regulated machine and frame system to quilt on.
  • I will do a simple all over meander/stipple (and if the mood strikes maybe I'll do something cooler)
  • I will provide the thread (Essential Pro in white)
  • You will provide the batting
  • You will provide the backing
  • You will provide the finished quilt top
  • You will pay for shipping both ways
  • Because of shipping (cost and reliability factors) I'm making this open to those in the US only.
  • You must send me your quilt top by June 20th if you expect me to get it back to you before I have this baby!
I will work out the specifics with the actual winner. Please do not send me your great grandmother's prized quilt or  a masterpiece you want to win blue ribbons with. Remember I'm offering a simple all over design NOT custom quilting. Remember that a squared up top will quilt up a lot better than one with wavy borders.

Anyway... if you're willing to trust me with one of your UFO's then by all means enter away!! Here are some examples of my quilting skills:


4-6 DQS 10 v1.2

8-19 DQS9 Sneak Peek 2


To enter:
  • Become a follower of my blog. Leave me a comment telling me so & tell me if you enjoy doing the quilting on your quilts
  • Follow the Quilty Giveaways blog. Leave me a comment telling so & tell me what you would have me quilt for you
That's it! 2 possible entries. Leave me a separate comment for each one and make sure that there is a way to contact you. Giveaway will close on Sunday 5/29 and I will draw a winner on Monday.


Hope you have a great week!
~ Norma

Blogger's Quilt Festival

Tuesday, May 17, 2011
The time is upon us once more for the spring Blogger's Quilt Festival. Basically it's a giant online quilt show. Free of charge and in your jammies if you so desire! You can find all of the other participating blogs at Amy's Creative Side.

I want to share my latest finish with you. This is "Heidi's Quilt"


Heid's Quilt 1


Those of you who have been following my blog for a while may remember that my dear friend lost her husband to cancer a year ago in February. I made this quilt for her using his shirts. The orange setting squares are from his favorite shirt. I was able to find a really awesome orange plaid for the back (Hobby Lobby.)


Heid's Quilt 2


This is my first official completely quilted on my frame quilt that did not end up with an all over stippling. I learned a ton in making this quilt. Like the importance of squaring up your finished blocks when you're dealing with so many different types of fabrics. Or how long it actually takes to do custom quilting. I very naively thought I'd finish up the quilting in a day. Well I worked on this quilt for about 4 days (don't forget I'm pregnant and have 2 little ones) and used a whopping 8.5 bobbins (these are larger than domestic sewing machine bobbins.) I also learned that your hands get sore from quilting for so long! Oh and I even had to rotate the quilt to get all of the sashings done.

Stats:
64"x64"
Fabrics: Shirtings
Sashing: Kona Bone
Machine pieced and quilted by me
It was made using the free Charming Stars pattern found at the Moda Bakeshop

It's not perfect but I love the end result and I know my friend loved it. I was so glad I was able to give it to her in person last week. That was the icing on the cake for a project that was lots of work. And here's a close up of the quilting.


Heid's Quilt 3


Feel free to look around my blog and take a look at my other recent love.
DQS10 finished

~ Norma

PS you can visit my other blog Quilty Giveaways to find the latest quilt related giveaways going on in bloggy land.

Double Duty (An Accuquilt Go! Tutorial)

Saturday, April 16, 2011
I've had my Accuquilt Go! for several months now. I was lucky enough to win a blog giveaway that included the Go! as well as 3 dies of my choice. (See my review of the Go! here.) Well this was a very tough decision since there are over 50 dies to choose from! I ended up choosing 2 strip dies and the Double Wedding Ring die. This may sound completely selfish but I mainly picked my dies according to price. There is just no way that I can afford to pay $80 per die. So I choose the more expensive ones that I wanted knowing that it would be easier for me to spend $30-$40 once in a while on some of the smaller dies.

I was really torn between picking the Double Wedding Ring die ($89) and the Rob Peter to Pay Paul die ($89.) In the end the Wedding Ring die won out because I really love that design and I know that some day I want to make a Double Wedding ring quilt and I can't imagine hand cutting all of those tiny pieces. As I was looking at the 2 dies side by side on my computer I had a wild and crazy idea that I could use the double Wedding Ring die to re-create the Rob Peter design!

Even though I recently received the Rob Peter die from Accuquilt I still wanted to test out my theory. So last night I pulled out my Wedding Ring Die and put my theory to the test.

 1. Cut one center section


 2. Cut 4 of the arc pieces


3. Sew the arc pieces to the center section
Here I was trying out a few different methods of sewing the arcs to the center piece. I tried pinning and also this method of not pinning. I think the non-pinning method will work better with practice. I also have the curve master foot (which I couldn't find at the time) that essentially is the same as the non-pinning method but with the help of a special foot.

This is the reason some of the corners are off. For this method to work you will need to be accurate in your corners or it will not look right in your finished quilt.

4. You will now trim your block to 9" centering the center fabric (stripes) within the 9" square. You basically have to eyeball this and 9" is enough to give you a 1/4" seam allowance at each of the 4 corners. Here I've added a small border to the block so that you can see that having your corners match will be very important!

Rob Peter block

As you can see corners 1 and 4 are really nice and perfect. Corner 2 is the worst and corner 3 is decent. I would suggest finding a method that gives you accurate piecing results for step 3 so that your blocks will turn out gorgeous!

Just to give you an idea of what the finished quilt would look like I whipped up these 2 quilt tops through the magic of Photoshop.

Rob Peter to Pay Paul

5 blocks x 5 blocks =about 43" square


Rob Peter to Pay Paul on point
On point with setting triangles and border
4 blocks x 5 blocks = 50"x 62.5" (plus border)

Enjoy!
~ Norma
Hover to Pin
Related Posts Plugin for WordPress, Blogger...
 
Designed with ♥ by Nudge Media Design