SLIDER
Showing posts with label tips. Show all posts

Vintage Goodness : 10 Tips for buying vintage suitcases

Thursday, August 26, 2010
Do you ever look at catalogs or websites and think, "I could do that!" I don't know about you but I sure do! In fact I've got a bookmark list a mile long with "I'm gonna do that someday" inspirations.  Every once in a while I actually follow through on those "gonna do" threats.

Two weeks ago I was at the thrift store when I spotted the loveliest, in excellent condition RED vintage suitcase. I almost walked away. Actually I was at the end of the isle and I just had to turn around and go back for it. You see I've seen some super awesome upcycled suitcase projects floating around the internet.

This week I tackled the suitcase before it was eaten by the procrastination monster. This is how the lovely vintage American Tourister cleaned up:


This one will be available in the shop (here) sold but trust me, I will not have any issues in keeping this beauty!

Vintage suitcases, especially the smaller hard back ones, are useful for carrying around  sewing projects, camera or music equipment, laptops, and of course make super cute carry on luggage. Here are 10 tips to help you in choosing vintage suitcases.

1) Check the outside for cracks and gouges (hard side) or tears (soft side.)

2)Avoid pieces with lots of scuffs. Big black scuffs are hard to get out. White pieces are especially hard to clean!

3) Inspect the latches to make sure they are in proper working order. Open and close them a few times.
4) Check to see that the suitcase closes properly all the way around.
5) Search for keys or combination codes. If you can't open the suitcase at the store, chances are you won't be able to open it once you get home.

6)Examine the "feet," often times these are broken, cracked, or have one or two missing.
 7) Look over the outside to see if there are spots where the color has faded. Light fading is common but don't buy one that has prominent fade spots.

8) Open it up and inspect out the interior condition. Make sure zippers work, check for rips, and make sure the lining is still securely attached to the case.
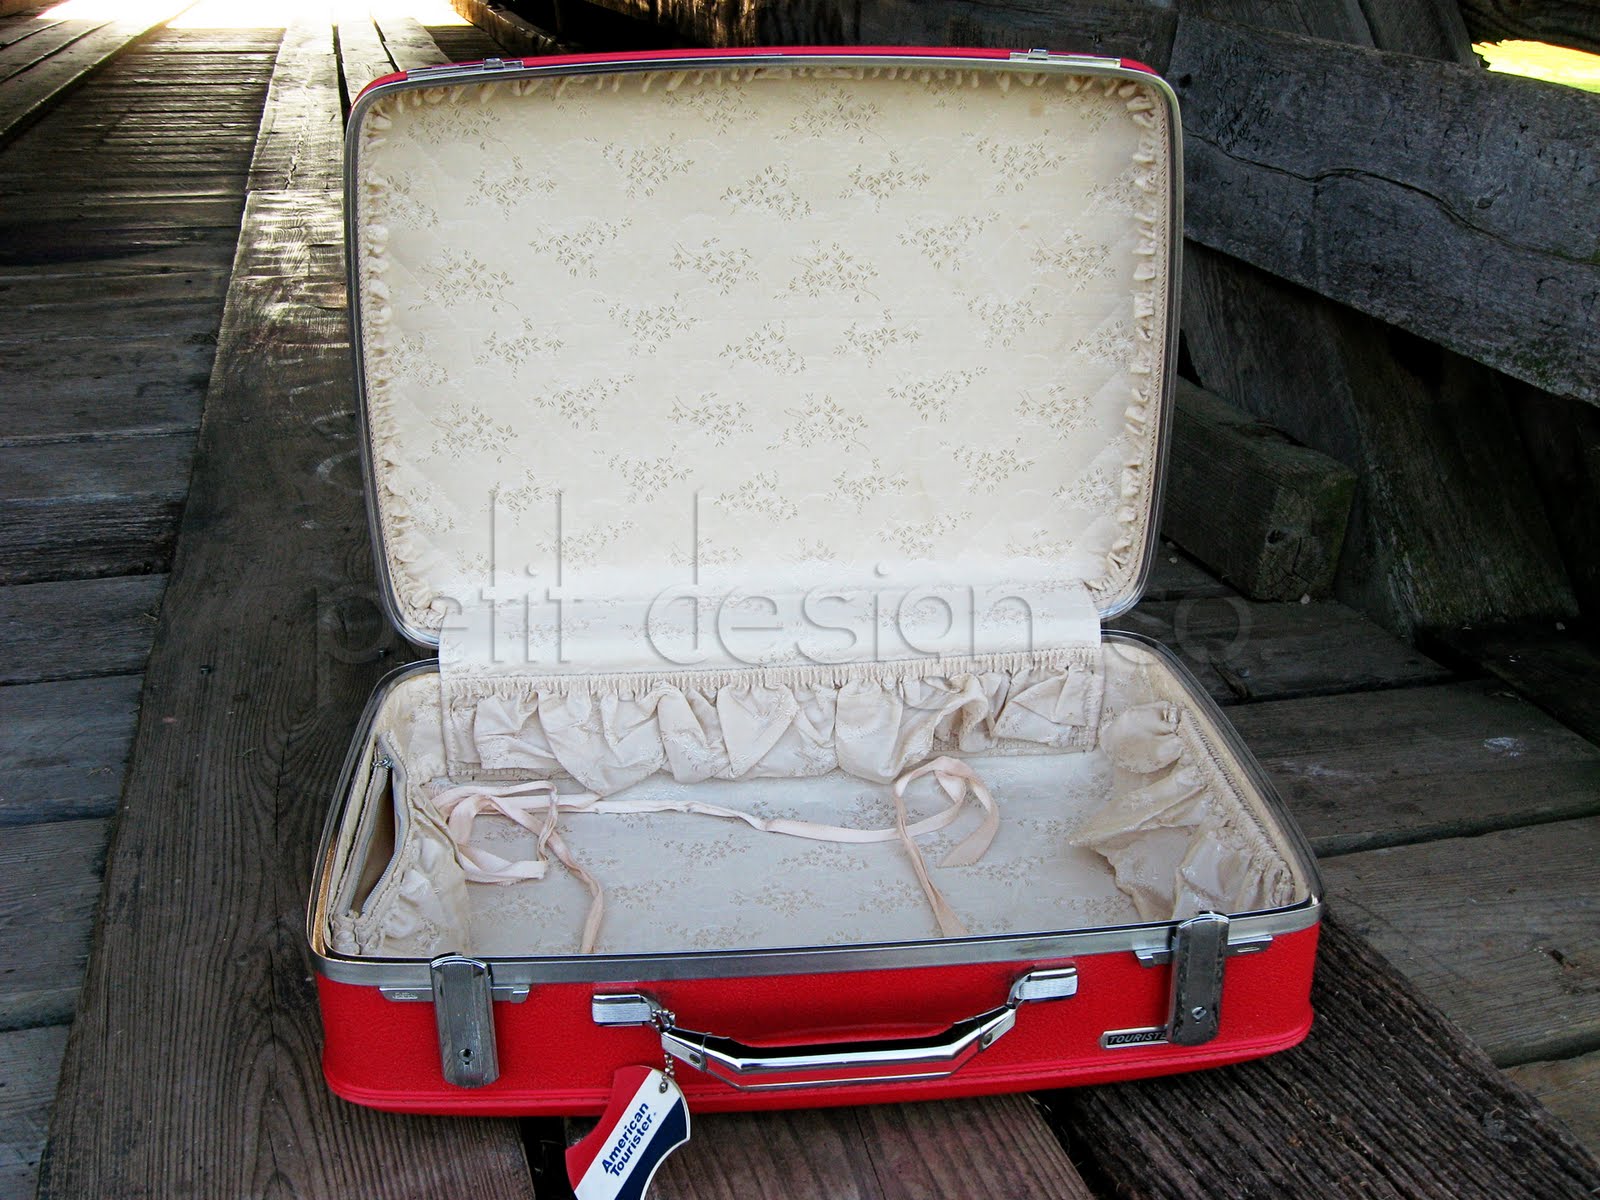
  9)If you can smell it before you even open it don't buy it! Be prepared to get a good whiff once you open the suitcase. Some pieces smell really gross, like cigarettes or who knows what! Most pieces have a slight smell of being cooped up. These can be aired out with an afternoon in the sun and some Febreeze.

10) Check the lining for stains. Light stains can be removed with a soapy rag, a spot carpet cleaner, or try a Tide To Go pen. Large dark stains are going to be nearly impossible to remove unless you're planning on gutting the whole lining, and that is a whole 'nother subject!


So what's on your "I'm gonna do that someday" list?

~Norma

Photography-along

Monday, August 3, 2009
Lately I have been inspired by all the beautiful photography floating around on Flickr as well as on my favorite blogs. I would really like to re-learn the things I learned back in my high school photography class - has it been 11 years already? I think I could be pretty good better at it, besides it runs in my family! Check out just a few examples of my brother's amazing photo skills!


Yes, I'm proud of my brother! ...and maybe a little jealous too! But in a good way! So while I may not have a fancy schamncy DSLR, yet, I just got myself a pretty decent point and shoot camera, a Canon PowerShot A570 IS - an oldie but a goodie. My goal is to get comfortable using it in full manual mode - Scary!! I know. Once I get comfortable with it, and I save up some money I'll think about upgrading to a DSLR. For now it is sufficient for my needs.

You may think you need a fancy DSLR to get some great images, but think again!!! I've been scourging the internet for info, tutorials, classes on improving your photography and you most definitely DO NOT need a fancy camera. Check out IvoryHut if you don't believe me!

So why don't you join me and learn along with me? I have found a great lesson set over on mourgeFile. It is comprised of 10 lessons that cover a wealth of information and techniques. What I really like about the lessons is that you have an assignment for each lesson so you actually have to practice what you learn! Don't worry though they're pretty simple assignments.

I was thinking we could take it one lesson per week (some might go for 2 weeks) and we could post our images on our own blogs and critique each others work (you could also sign up for a morgue file account and post your pictures in the lesson forum on morgueFile for even more feedback.) Through out the week I'll post other articles and links on the lesson's subject matter that you might find useful.

So leave a comment and let me know if you are "in." I'll post everyone's links on my sidebar so you can visit each other's site and give some constructive criticism. Feel free to join in even if we have already started. We'll start on Thursday Aug 6th!!


Here's a button for your blog:


Just right click and select "save as" to save it to your computer, then upload it to your blog. You can link to this post by using this url: http://blog.petitdebutant.com/2009/08/photography-along.html

You can find the lessons here:


See you soon!

Painting a door

Friday, April 3, 2009
I found it! My picture was saved to the desktop for easy access and I had forgotten where I put it. This will be more of a tips post rather than a step by step post.


Materials I used:
  • Interior latex paint (white, gloss)
  • Angled brush (I love my Purdy)


Tips:
  • Dust and clean your door first. (I like Simple Green)
  • Paint with the grain of your door ( Sections 1, 5 & 9 were painted with horizontal strokes, the rest were done in vertical strokes)
  • Look at your door and you will see the "sections" already picked out for you
  • Start on the top half of the door ( the numbers indicate the order in which i started painting.
  • As I painted section 1 I also painted to the top of the door (when it is open)
  • As I painted sections 3 & 7 I painted the inside edge of the door (when it is open)
  • Let dry a couple of hours before you come back and decide whether you need another coat. As your door is drying it may look uneven but will look perfect once dry.
I like to use the glossy paint on doors and trims because it stands up to cleaning and it just "pops" and brightens any room. I especially love the effect on a windowsill because the paint seems to reflect the light into the room better.

I do have a more common type of door (with out the curved panels) I'll try and do up another little numbered picture of that door as well. Feel free to ask me any questions!

This week I hope to tackle the french door in the kitchen and maybe even the staircase in the living room!
Hover to Pin
Related Posts Plugin for WordPress, Blogger...
 
Designed with ♥ by Nudge Media Design