


I'm going to teach you how to make this lovely fabric decorator ball that can double as an artichoke or pine cone depending on how you look at it.

A bunch of these in a bowl or large vase will give you a beautiful home decor piece. Plus you can make them in all sorts of colors depending on the season/occasion/holiday and add a punch of texture to your decor.
You will need:
- a styrofoam ball (I used a green 3" floral ball, they're cheaper than the white styrofoam)
- flat head pins
- 48 2.5" fabric squares in your choice of color (you can use more if you like)
- a thimble is very handy for pushing in those pins

I'm going to start by showing you 3 different ways to fold your fabric. Take your pick as to which you want to use. Feel free to experiment with each method to see which ball you like better. Making one of each will add variety to your bowl/vase but will still feel coherent because they are similar but different.
These are the 3 ways you can fold your fabric:
(I used method B)

Method A:

1) Lay your fabric square right side down. 2) Fold corner "1" over to corner "3." 3) Fold corner "2" over to corner "4"
Method B:

1) Lay your fabric square right side down. 2) Fold side "2" down to side "1." 3) Fold side "a" over to side "b."
Method 3:

1) Lay your fabric square right side down. 2) Fold side "1" down to side "2." 3) Fold corner "a" down to the half way point. 4) Fold corner "b" down to the half way point to meet corner "a."
How to Make the Ball:
1) Start by placing one fabric square on the top of the ball. Place a pin at each corner.

2) Place another fabric square directly opposite the first square on the bottom of the ball. This will be the bottom of the ball. (Note: this second square is not in any of my pictures because I did it after the fact.)
3) Take one of your folded fabric pieces and pin it to the ball towards the top of the ball. Pin it on the left hand corner only. You want to make sure you have the folded edges towards the top and not the cut edges. The cut edges will be covered by subsequent layers. (Note: I fold as I go as I did not want to have to iron these ahead of time, I just finger press)

4) Now take your next folded piece of fabric and pin it to the folded piece of fabric you just pinned down. This time place the pin so that you tack down the unpinned right hand corner of your first fabric while at the same time (with the same pin) pinning down the left hand corner of your current piece of fabric. Clear as mud? Continue on in this manner until you form a ring of fabric all the way around the ball.

It doesn't really matter how many pieces of fabric you use. I used 7 in the picture to go all the way around.
5) Start the next row in the same manner but a little bit lower on the ball. This time stagger the "points" of your folded fabrics so that there is a "point" in between each of the points from the previous row. Continue adding folded fabrics until you finish the row.

6) Continue on adding rows until you get close to the bottom of the ball. I ended up making 6 rows. Once you reach the bottom of the ball you can use any remaining squares to cover up any gaps as best you can.
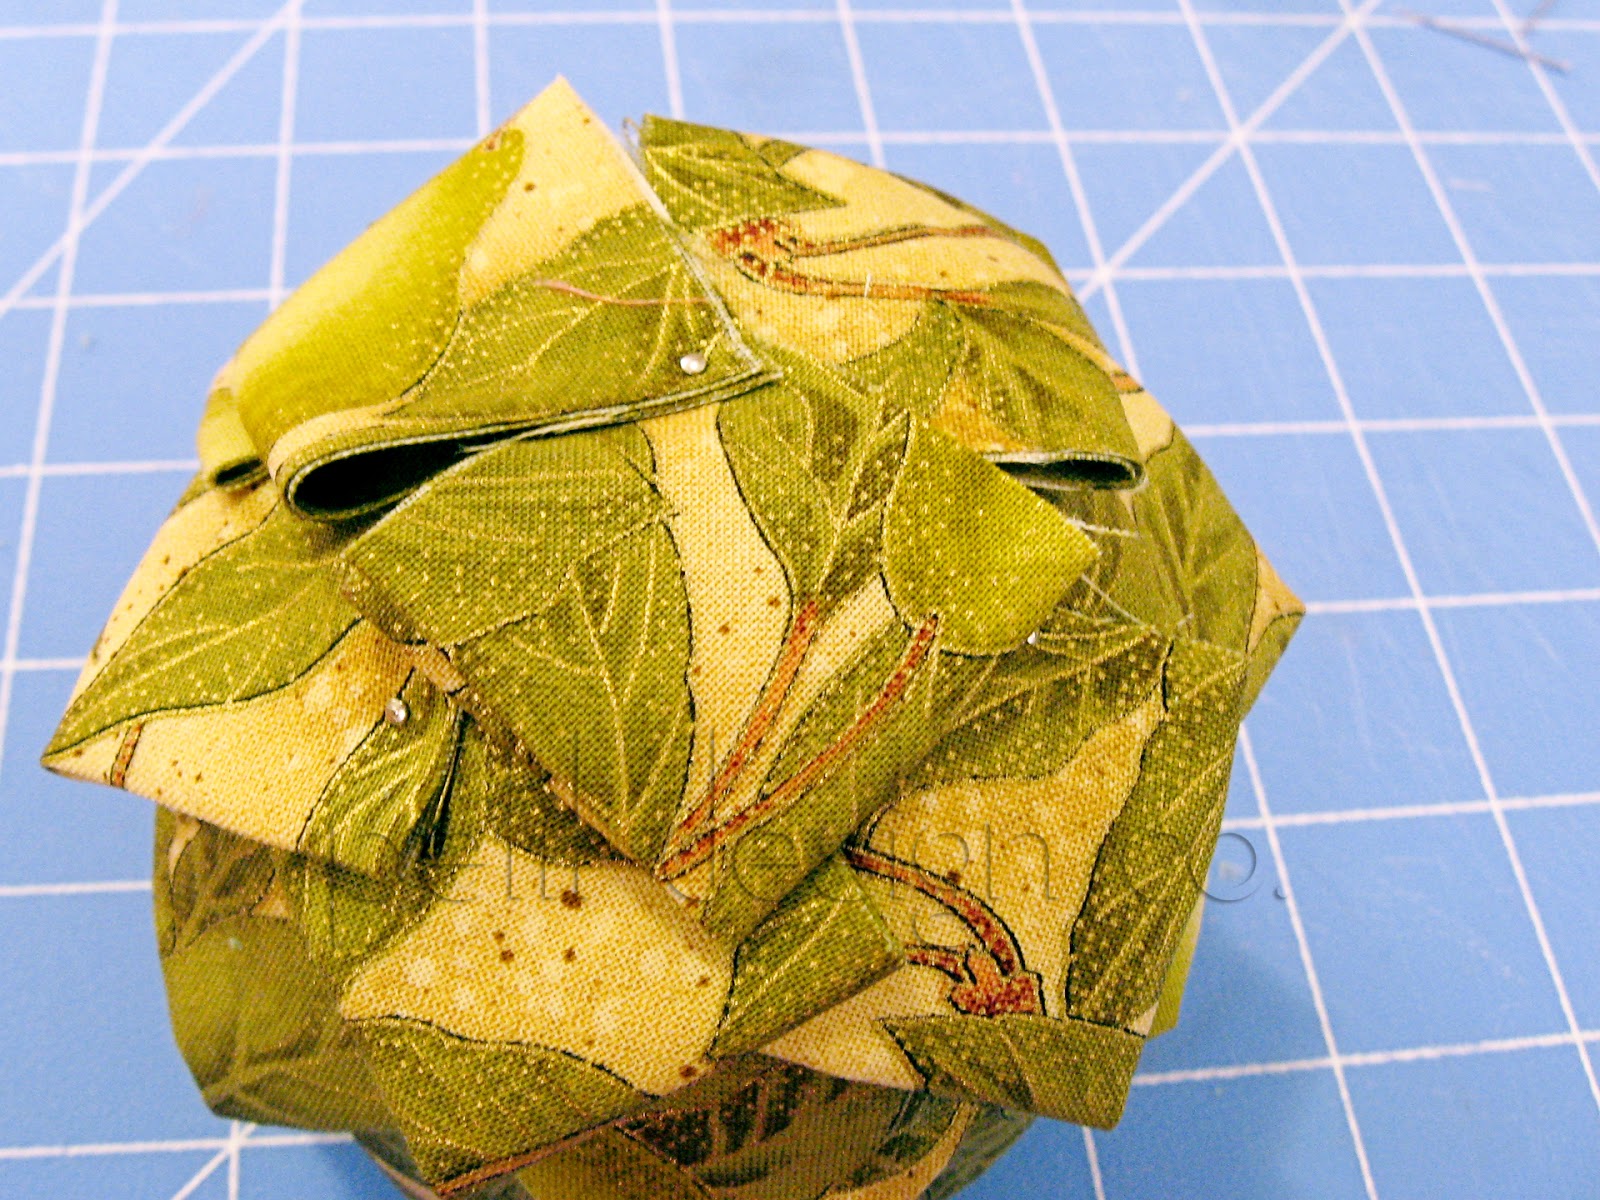
If any of your pieces are being unruly and sticking up all over the place you can tuck a pin into the folds to help keep them in place. Like so:

and Voila!

~Norma
PS if you make any of these I'd love to see them. You can add them to the Petit Design Co. Flickr pool


6 comments :
You really chose fabric that makes it look like an artichoke! Very fun!
what a neat tutorial! i agree with anne, what a perfect fabric.
Very creative!
So pretty. And I agree with Anne that your fabric choice was perfect.
oh my this is so amazing.
I have been drying real ones to put in a bowl. These are just perfect and will be all over my christmas tree!!!
way to go!
This is a truly cool project. I will be bookmarking for sure!
Post a comment ( 6 )